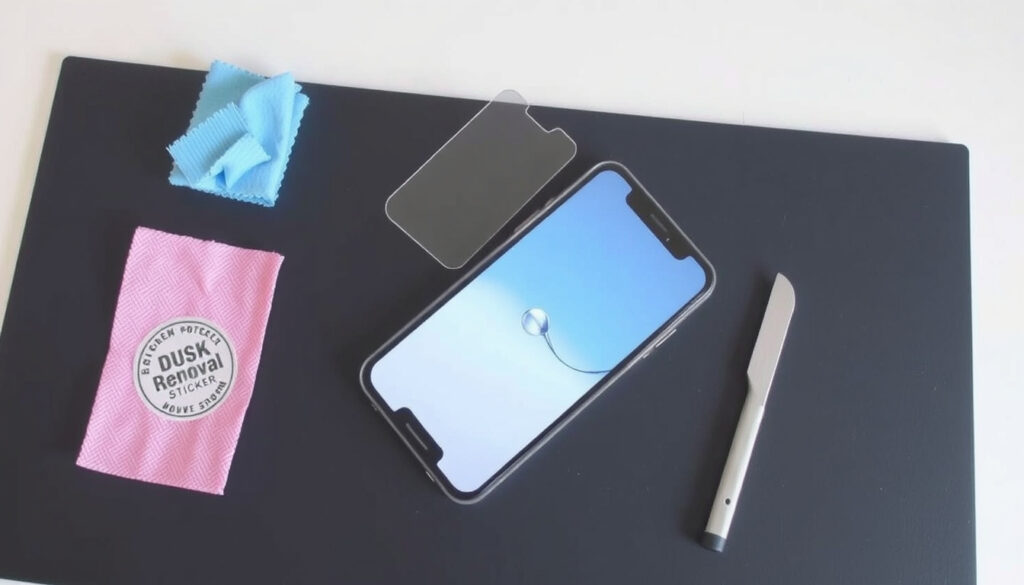
How to Install Screen Protector: Step-by-Step Guide
There’s a moment of quiet dread when you peel the backing off a new screen protector and realize one spec of dust has already settled on the adhesive. With a few deliberate steps, you can install a screen protector in under three minutes with no bubbles and no do-overs — and this guide shows exactly how.
Average installation time: 2-3 minutes ·
Success rate with proper preparation: Over 90% ·
Common mistakes: Dust specks and misalignment ·
Screen protector types: Tempered glass, TPU, PET
- Prepare your workspace and hands
- Clean the screen with alcohol wipe and microfiber cloth
- Remove dust with adhesive sticker
- Align the protector using guide stickers or frame
- Apply from one edge, lowering gradually
- Squeegee out air from center to edges
Quick snapshot
- Wash hands before starting (wikiHow)
- Check orientation and use guide stickers (Holdit)
- Press gradually and squeegee out air (screen-protectors.com)
- Small bubbles may settle within 24 hours (screen-protectors.com)
Four key facts, one pattern: success depends almost entirely on what you do before the protector touches the display.
For related guides, see How to Screenshot on a Laptop and Fix Windows Update Error.
| Fact | Detail |
|---|---|
| Ideal installation time | 2-3 minutes |
| Most common mistake | Dust trapped under protector |
| Success rate with preparation | Over 90% |
| Tools needed | Cleaning wipe, micro fiber cloth, dust absorber |
How do you properly apply a screen protector?
Clean you screen thoroughly
- Wash your hands with soap and water before touching the phone (wikiHow).
- Use the included alcohol wipe to remove oils, then dry with a microfiber cloth (GadgetsFeed).
- Polish until no streaks remain — any residue can look like a bubble once the protector is on.
“Wash and dry your hands before installation. Clean the screen thoroughly.” — Walli Cases representative
Skipping the handwash adds finger prints to the screen that the alcohol wipe may not fully remove — increasing the chance of a visible smudge under glass.
Use the dust absorber to remove particles
- Peel the protective sheet over the dust-removal sticker and dab it across the screen. It lifts particles that the cloth missed (wikiHow).
- If a particle is stubborn, use a piece of tape to lift it off directly (screen-protectors.com).
- Work in a still-air room: close windows, turn off fans and AC (GadgetsFeed).
“The key is to align the protector before it touches the screen.” — Phone company employee (Reddit)
A steamy bathroom after a hot shower is one of the most dust-reduced rooms in a home — moisture settles airborne particles before they land on adhesive (SaharaCase).
Align the screen protector carefully
- Remove the release liner only after the protector is hovering over the screen (Holdit).
- Use the alignment stickers or frame included with many tempered glass kits (Holdit).
- Lower the protector from one edge so trapped air can escape as it settles (Cruzerlite).
The implication: most alignment mistakes happen because people try to center the protector after it has already touched the adhesive. Use the stickers, read the labels, and go slow.
Which way up does a screen protector go?
Identify the adhesive side
- The adhesive side is the one that sticks to your screen — usually the side covered by the labeled release liner (GadgetsFeed).
- Tempered glass protectors often have clear adhesive on one side and a smooth, hard surface on the other.
- If the protector has a numbered tab (like “1” or “2”), that tab marks which layer to peel first.
Check for protective film layers
- Many protectors ship with two films: a release liner on the adhesive side and a top protective film (Holdit).
- Peel only the side marked for removal — typically the tab labeled “1” — and leave the top film in place until after squeegeeing.
- If you cannot see a visible difference between sides, hold the protector against the screen without removing any film to test fit.
What this means: getting the orientation wrong usually means lifting and repositioning — which invites dust. Labeled tabs exist to prevent exactly that mistake.
How to install screen protector without bubbles?
Work in a dust-free environment
- A steamy bathroom after a hot shower reduces airborne dust better than any other room (SaharaCase).
- Avoid carpeted spaces — they hold dust and lint that circulates when you move (UpTechNet).
- Turn off the phone before starting to reduce static pull on particles (GadgetsFeed).
Apply from one edge and press outward
- Keep the protector low and close to the display while peeling the backing reduces air entrapment (GadgetsFeed).
- Lower the protector from one edge so air moves out naturally as the glass descends (Cruzerlite).
- If the protector touches prematurely, lift it immediately — do not press it down and try again.
|
Use a squeegee or credit card to remove air
- Press from the center toward the edges in straight strokes using a microfiber cloth or plastic squeegee (Holdit).
- Small bubbles under 1 mm may disappear on their own as the adhesive cures over 24 hours (screen-protectors.com).
- For stubborn bubbles, lift the nearest corner just enough to rework the area, then press again (screen-protectors.com).
Larger bubbles almost always mean dust or residue is trapped — lifting one edge and using tape to remove the particle is the only reliable fix (screen-protectors.com).
The trade-off: working in a steamy bathroom trades slow moisture cleanup for near-zero dust. For most home installs, that trade is worth making.
How to fix screen protector put on wrong?
Lift and reposition immediately
- If alignment is off or a particle is trapped, lift the protector from the nearest corner within the first minute (screen-protectors.com).
- Use a piece of tape to lift the dust speck off the adhesive without touching it with your fingers.
- Gently lower the protector again from the same edge-approach described earlier.
Remove dust with tape
- Fold a piece of tape into a loop (stick y side out) and dab it on the particle trapped under the protector (screen-protectors.com).
- Do not slide the tape across the adhesive — dab and lift.
- If multiple particles are trapped, remove the protector entirely, clean the screen again, and start fresh.
Replace if damaged
- A protector that has been fully removed and reapplied more than once will accumulate dust and lose adhesive grip.
- If bubbles persist after 24 hours, the adhesive may have cured around a trapped particle — replacement is the practical solution.
The pattern: most “mistakes” come from rushing the first alignment. Giving yourself 60 seconds to lift, dab, and reset beats living with a crooked application for months.
Can I just peel off my screen protector?
Reasons to remove old protector
- Cracks, chips, or bubbles that won’t clear after 24 hours signal the protector needs replacement.
- Peeling edges that collect lint can trap moisture against the screen.
How to remove safely
- Start from one corner and pull slowly at a low angle (wikiHow).
- If the adhesive fights, apply gentle heat from a hair dryer to soften it.
- Clean the screen thoroughly after removal before applying a new protector.
The pattern: screen protectors are designed as single-use items. Reusing a pulled-off protector trades a few dollars for a visibly worse result — the saved cash isn’t worth the trapped dust.
reddit.com, saharacase.com, youtube.com, inairspace.com, youtube.com, youtube.com
Frequently asked questions
Can I reuse a screen protector after removing it?
No — once removed, the adhesive collects dust and loses bond strength. Reapplying usually results in bubbles and poor adhesion at the edges.
Do screen protectors leave residue on the screen?
Quality tempered glass and TPU protectors leave minimal to no residue when removed properly. Heat helps loosen any leftover adhesive.
Will a screen protector affect touch sensitivity?
Quality protectors thinner than 0.3 mm typically do not affect touch response. Thicker glass or poor installation may create a gap that reduces sensitivity.
How often should I replace a screen protector?
Replace when you see cracks, chips, or bubbles that won’t clear. Many users replace once per year, though heavy users may swap every 6 months.
Can I install a screen protector on a cracked screen?
Yes, but the protector may not adhere evenly over the crack. Any air gap will show as a permanent bubble.
What is the best environment to install a screen protector?
A steamy bathroom after a hot shower or any still-air room with closed windows, no fans, and no AC (SaharaCase).
How do I know if a screen protector is compatible with my phone?
Check the product listing for your exact phone model. Protectors designed for a specific model include cutouts for the camera, speaker, and sensors.
Can you use a screen protector on a privacy screen?
Yes, but the privacy filter reduces viewing angles further — combined with a protector, the screen may appear noticeably dimmer from the side.
For anyone installing a screen protector today, the decision is straightforward: spend three minutes on preparation — handwashing, dust removal, alignment — or spend an hour redoing it later. A two-dollar dust absorber and a still-air room separate a perfect first try from a frustrating do-over.
More related posts
 When Is Father’s Day 2026? Dates by Country
 How to Play Go Fish: Rules, Card Counts & Tips
 Daylight Savings 2026 New Zealand: Dates, Time Change, and FAQ
 42 USD to NZD: Complete Conversion & Exchange Rate
 The Last of Us Season 3 – Release Date Cast Plot Details
 What Time Does Warehouse Close? Hours & Policies
 Pulled Pork Slow Cooker NZ: Best Liquid & Tips for Kidney Diet
 Iron Lung Box Office: Hit or Flop? Budget & Gross Compared
